Paragraph Outline Levels
Paragraphs can be assigned an outline level. Outline levels range from 1 to 9, allowing for a hierarchy of 9 levels of paragraphs. A "Body Text" paragraph has no hierarchy, and the preceding outline level is attached to the paragraph to which it is attached.
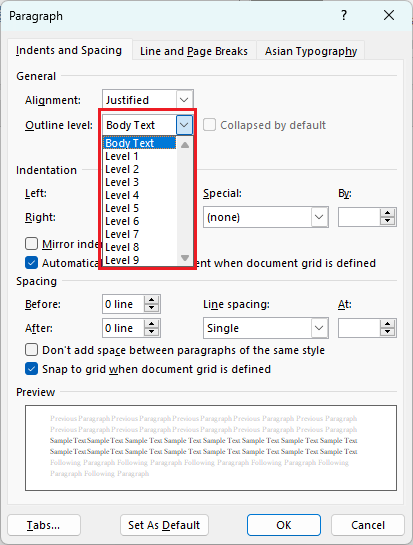
To specify an outline level for a paragraph, 1) place the cursor on the paragraph in the editing window, 2) display the Paragraph dialog in the Paragraph group of the ribbon "Home", 3) select the outline level you wish to set, and 4) click "OK" to close the dialog.
When you set an outline level for a paragraph, that paragraph appears in the Navigation window. In the following document, a one-line "Normal" paragraph is placed in front of a block, and an outline level is set to the paragraph (here, a paragraph with only an outline level is used as a heading). You can see that the paragraph with the outline level set appears in the Navigation window.
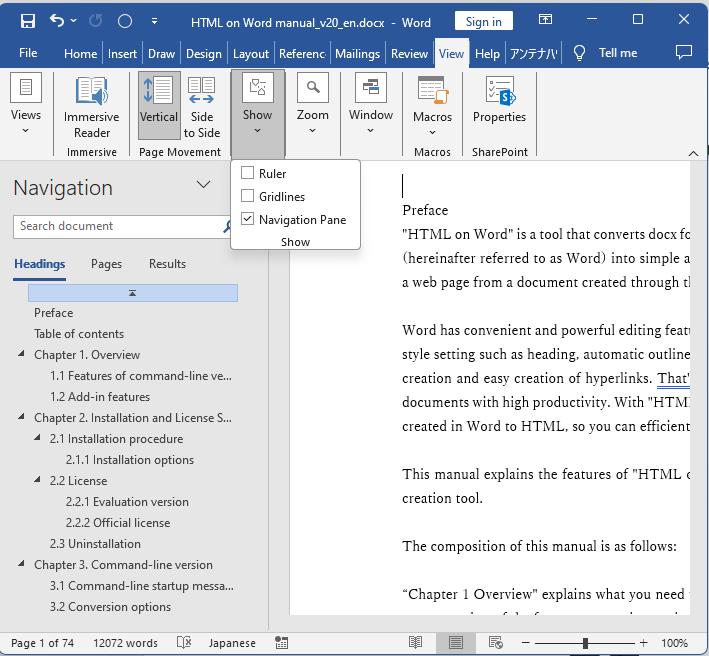
Navigation is often introduced as part of the heading style feature, and many people understand it as a heading style feature. However, navigation is an outline-level feature. In addition, see also "Navigation in Headings".
A table of contents can be automatically generated by collecting paragraphs with outline levels.
The automatic table of contents generator, often presented as part of the heading style feature, creates a table of contents by collecting paragraphs with set outline levels. The default is up to outline level 3, with an option to change the level. See also "Automatic Table of Contents Generation from Headings".
Outline Number
Outline numbers are hierarchical numbers such as "1, 1.1, 1.1.1, ...", "Heading 1, Heading 2, Heading 3, ...". With outline numbering, you can automatically assign hierarchical numbers corresponding to the multi-level bullet and heading levels.
|
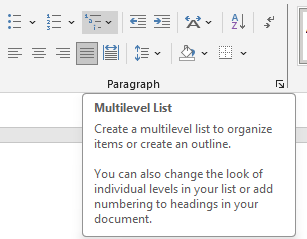
To set the outline number, use the Multilevel List in the paragraph group of the ribbon "Home". |
|
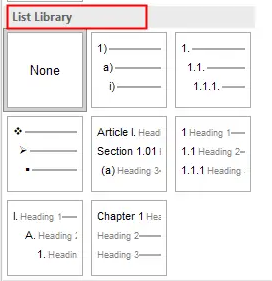
The menu that appears when you click on a Multilevel List has a "List Library" of pre-layered outline numbers. |
There are two types of list libraries: (1) a type with only hierarchical numbers or symbols, and (2) a type with the word "Heading" after the number.
|
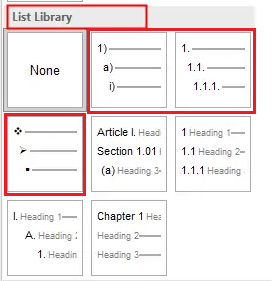
(1) A type of numbers or symbols is used for line numbers in hierarchical bullet lists. |
|
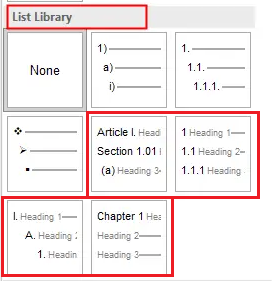
(2) The other is for use as a hierarchical heading number. |
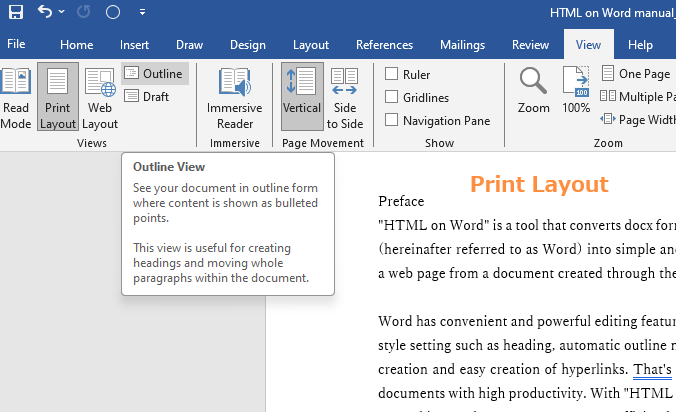
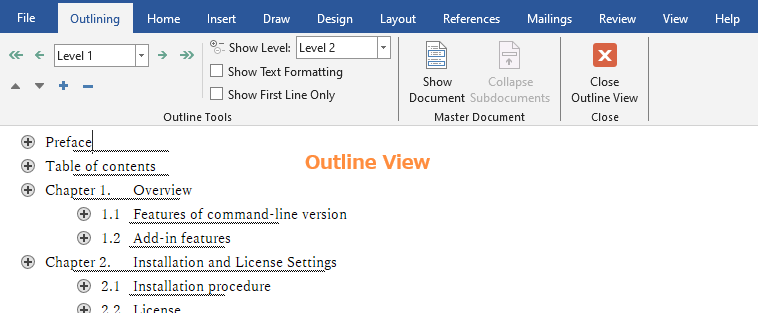
Outline View and Editing Outline
Clicking on the "Outline" command in the ribbon "View" changes the editing window to a unique display scheme: a paragraph outline view. The ribbon will also change to "Outlining" (bottom of the figure).
The "Outlining" section contains the Outline tool, which allows you to set an outline level for a paragraph, raise or lower the hierarchy of outline levels, or group levels below a given level and move them backward or forward in the document.

Heading Styles in Word
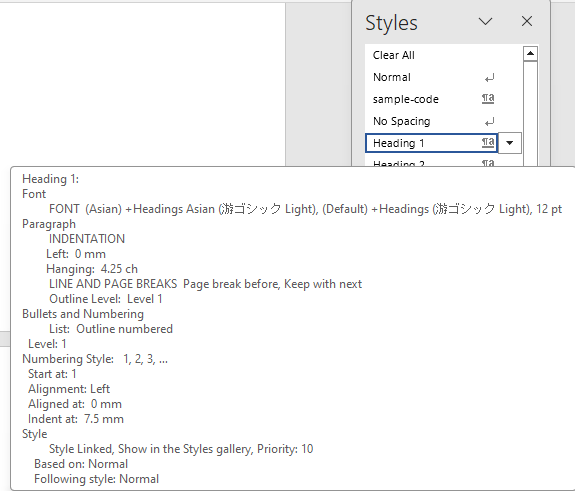
Headings are set in a style that is more prominent than the body text. For example, (1) the font is set to Gothic, (2) the font size is increased, (3) indent is different from that of the body text, and (4) the line space before (above in horizontal writing, right in vertical writing) and after (below in horizontal writing, left in vertical writing) the heading is spaced. The following figure shows the detailed style settings for Heading 1.
Applying Heading Styles

Apply the Heading 1 style to a paragraph using the Style Gallery |
When you start editing a document, only "Heading 1" and "Heading 2" are displayed in the Style Gallery of the ribbon "Home". To apply the Heading 1 style to a paragraph, in the edit window, (1) select the paragraph and (2) click on "Heading 1" in the Style Gallery. If "Heading 2" is applied to a paragraph, "Heading 3" will appear in the Style Gallery. When "Heading 3" is set, "Heading 4" will appear. |
Ready-made heading styles in Word
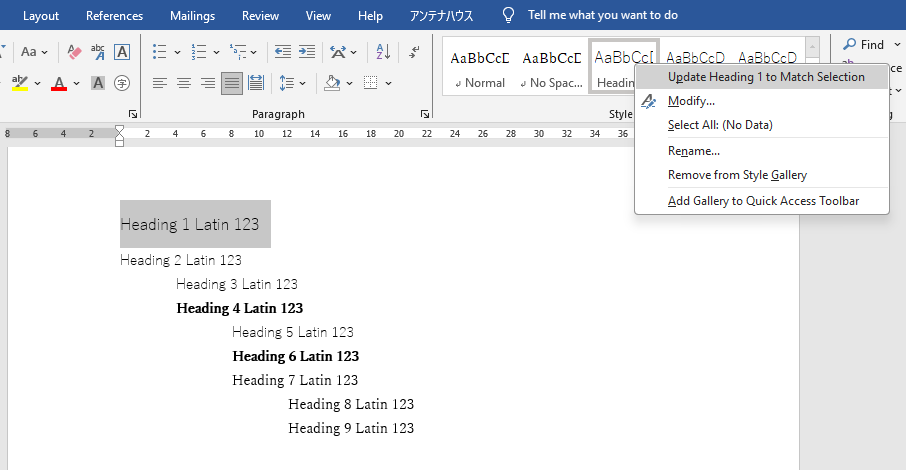
Word provides ready-made heading styles, Heading 1 through Heading 9. The following figure shows an example of the application of ready-made Heading 1 through Heading 9.
Heading 1 has a larger font size and more space before and after the line. As the heading level decreases, the indentation at the beginning of the line becomes larger, and so on, with a step change in appearance at the level of the heading. When the mouse pointer is hovered over, the mark where the outline level is set appears.

If you want to change Word's heading style settings in your own way, it is easy to do so in the following way.
For example, if you want to change the style of Heading 1, (1) place the cursor on any paragraph and apply the Heading 1 style, (2) interactively change the desired style for that paragraph, (3) right-click on Heading 1 in the Style Gallery and click "Update Heading 1 to Match Selection". This will update the style of Heading 1 in the document you are editing all at once.
Word's ready-made Heading 1 through Heading 9 styles have a paragraph format that specifies an outline level that matches the heading level. So when you apply a heading style to a paragraph, the paragraph will have an outline level that matches the heading level. As a result, simply adding a heading activates the outline level feature.
Paragraphs with a heading style are displayed in the navigation window. In the following example, outline level is set to the title and subtitle, so the title and subtitle are displayed in the navigation as well as the heading.

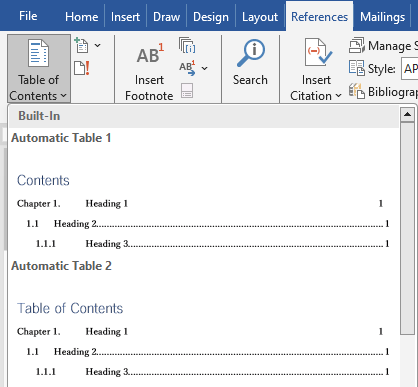
You can automatically create a table of contents from a paragraph to which you have applied a heading style with the "Table of Contents" command on the ribbon "References". This is due to the fact that heading styles have a paragraph outline level. The default outline level adopted for table of contents is level 3, and the level can be optionally changed.
|
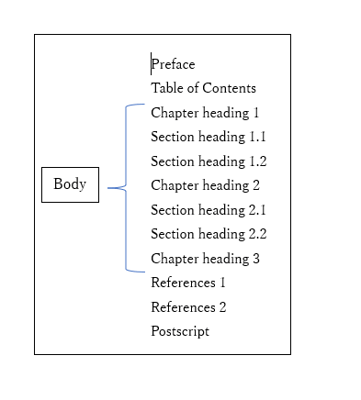
A printed book is divided into three main sections: preliminary, body text, and appendix. The main body of a printed book is the body text, with a preface and table of contents in the preliminary, and references, index, and postscripts in the appendix. |
|
It is common practice to put hierarchical numbers such as chapters, sections only for body headings, and not for preliminary or appendix headings. This type of heading numbering cannot be done by placing a heading with a heading style at the beginning of each block and then adding outline numbers.
To create a heading like printed book, the body of the text should be given an outline number for the heading style, and for the preliminary and appendix, only the outline level, not the heading style, should be set for the heading paragraphs. This allows for the automatic generation of a printed-book-like heading style and table of contents.
The left side of the following figure shows the result of creating a table of contents with heading styles and outline numbers set for all headings. The right side shows an example where the body text is set with heading styles and outline numbers, while the preliminary and appendix are set to outline level only.
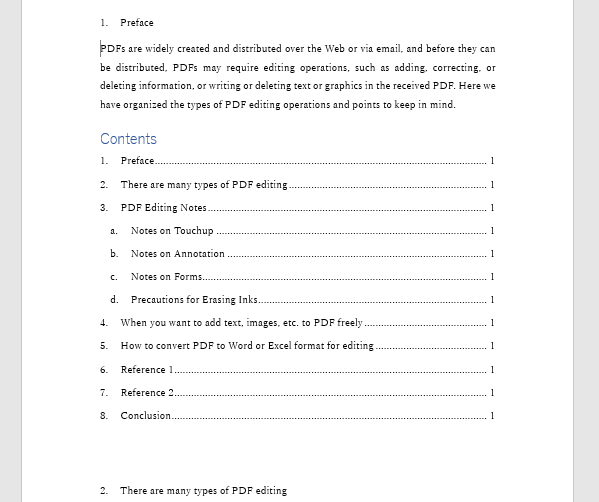
Table of contents created using only "heading styles + outline numbers". |

Advanced table of contents using "heading styles + outline numbers" and outline levels. |
Awards


Proud Member